How to Create Unlimited Custom Stencils with Supplies You Own | Totally Techniques
Transform your paper crafting game with this genius technique that costs practically nothing!
Hey there, fellow craft enthusiasts! I'm Lynsay Mahon, and today I'm spilling one of my favorite paper crafting secrets that's going to revolutionize how you think about custom stencils.
Picture this: You're browsing craft stores, eyeing those gorgeous stencils, but they're either too expensive or just not quite what you had in mind. Sound familiar? Well, what if I told you that those dies collecting dust in your craft room could become an endless supply of custom stencils?
Welcome to this month's Totally Techniques Blog Hop. Each month, our team shares hand-picked techniques and projects to help you make your next paper-crafted project. Each of our designers shares a handmade creation featuring the technique, along with ideas to inspire you! Today, we're diving deep into the custom stencil world that's about to become your new obsession!
Why Custom Stencils Are a Complete Game-Changer
This month’s technique features a tool that will help you make the most of your punch and die collections: custom stencils! If you’ve ever wanted to add detail to a project without having to freehand it, this will be the technique for you!
Before we jump into the how-to, let me explain why this paper crafting technique is absolutely brilliant:
Consistency That Actually Works: Remember those wonky handwritten party invitations that looked like a kindergartener made them? Yeah, those days are over. Custom stencils give you perfect repeatability every single time. Whether you're cranking out 50 wedding invitations or a stack of Christmas cards, each one will look professionally crafted.
Your Wallet Will Thank You: Here's some math that'll make you smile – one DIY stencil can replace dozens of store-bought ones. Use it with ink, embossing paste, spray mists, or whatever your creative heart desires. It's like having a magic money-saving wand!
Unleash Your Inner Design Rebel: Tired of seeing the same patterns everywhere? With custom stencil techniques, you're not limited to what some designer thought was trendy. Create exactly what YOUR project needs, when you need it.
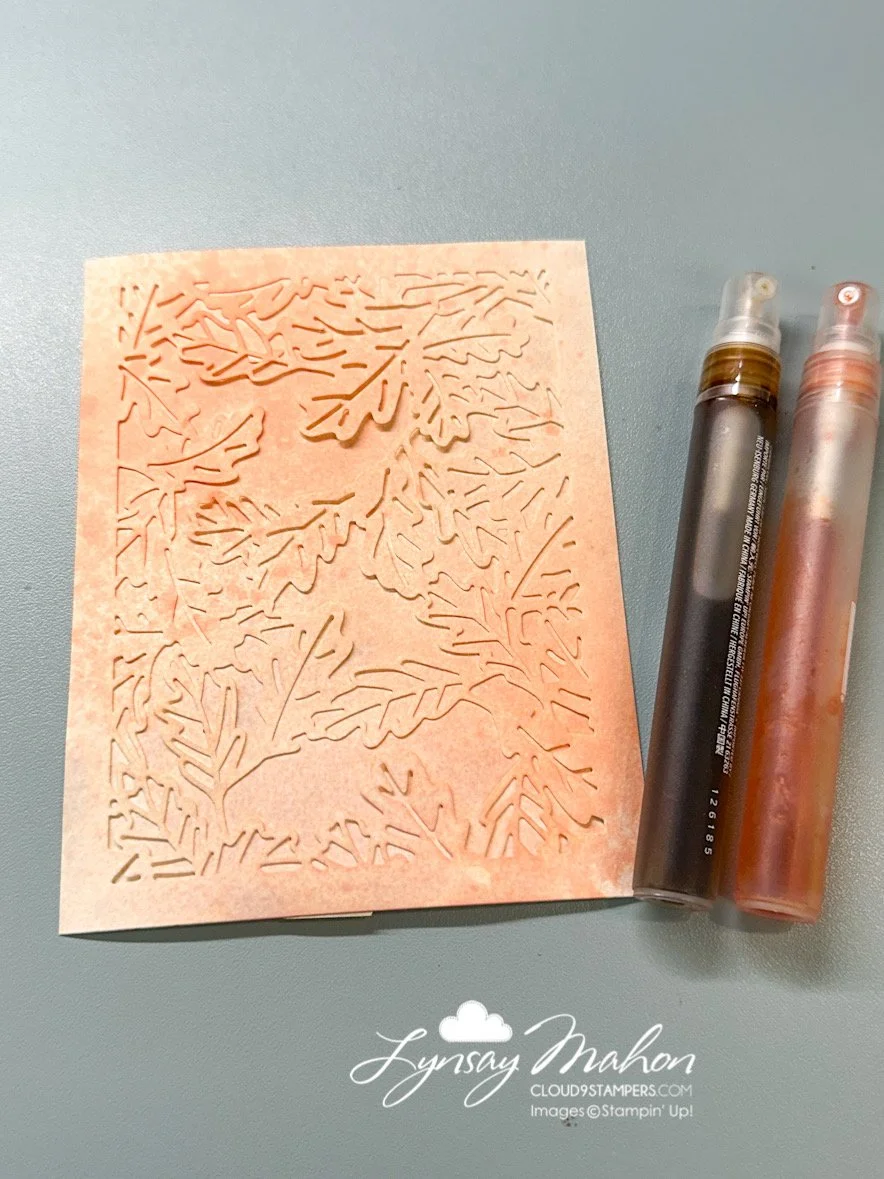
Custom stencil made with the Amber Autumn Bundle by Stampin’ Up!
The Simple Supply List (You Probably Have Everything Already!)
Water-based ink pads (Stampin’ Up!’s Classic ink pads are perfect for this.)
A Die set and Stampin’ Cut & Emboss Machine (I used the Amber Autumn Bundle from Stampin’ Up! available September 2, 2025).
Basic White Cardstock (the unsung hero of every craft room)
That's it. Seriously.
You can find the exact products I used on this card below.
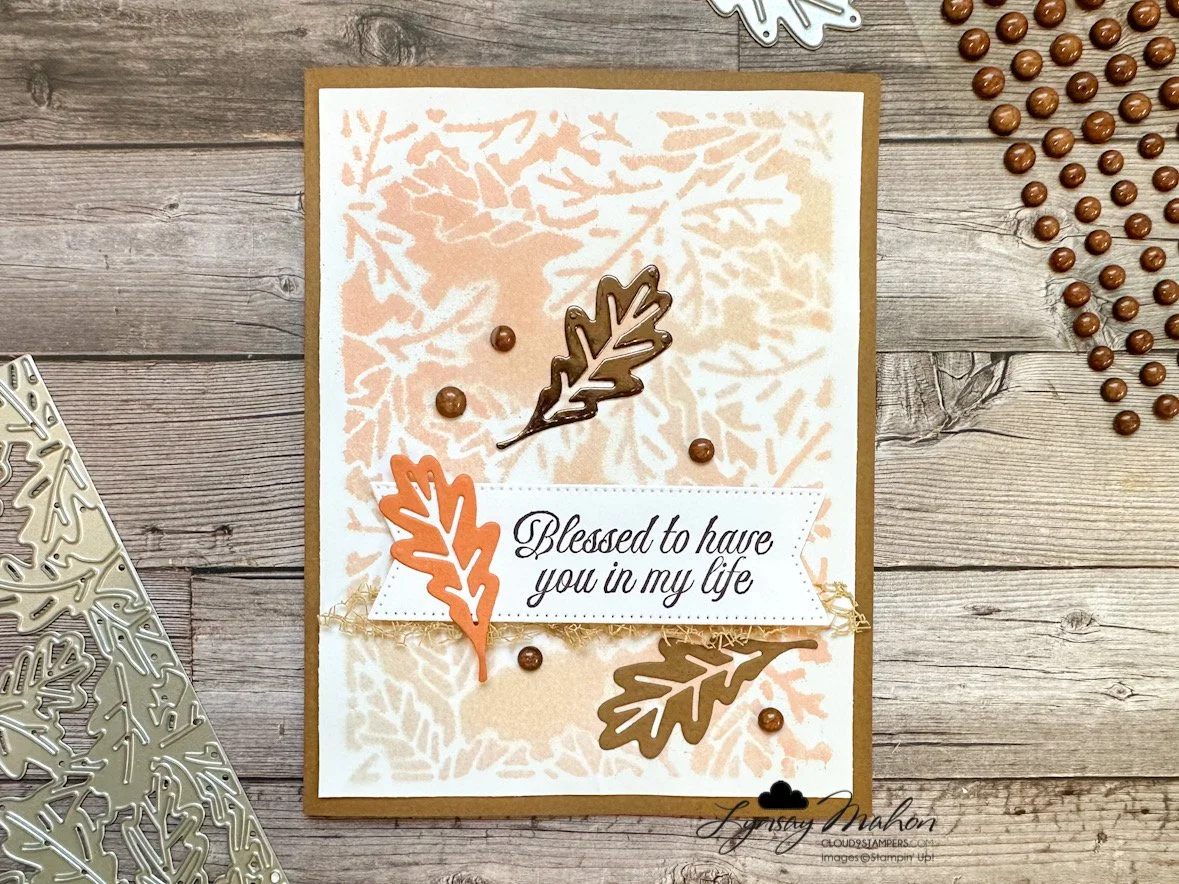
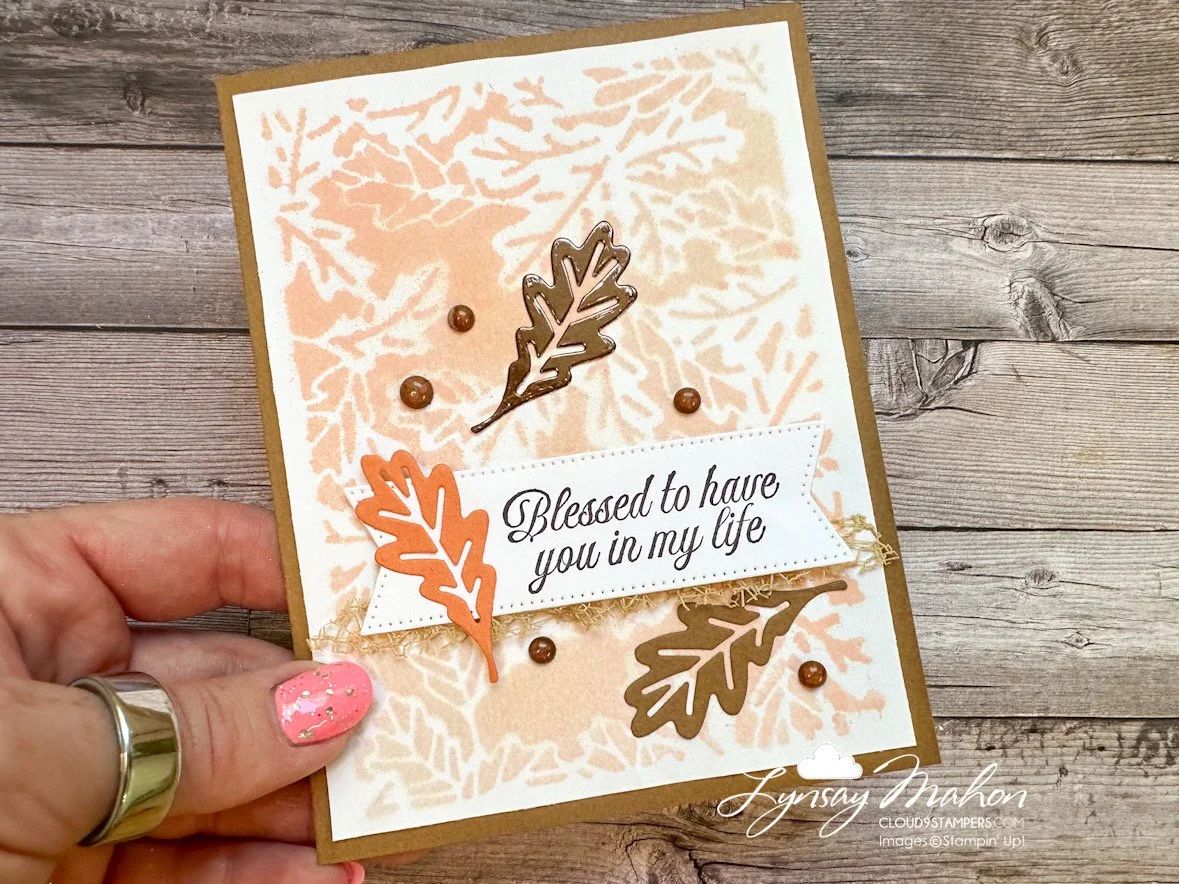
Amber Autumn card made with a custom stencil
The Step-By-Step Custom Stencil Technique:
(as shown on my card example)
Ready to create something amazing? Here's how to master this paper crafting technique:
Step 1: Create Your Stencil Base
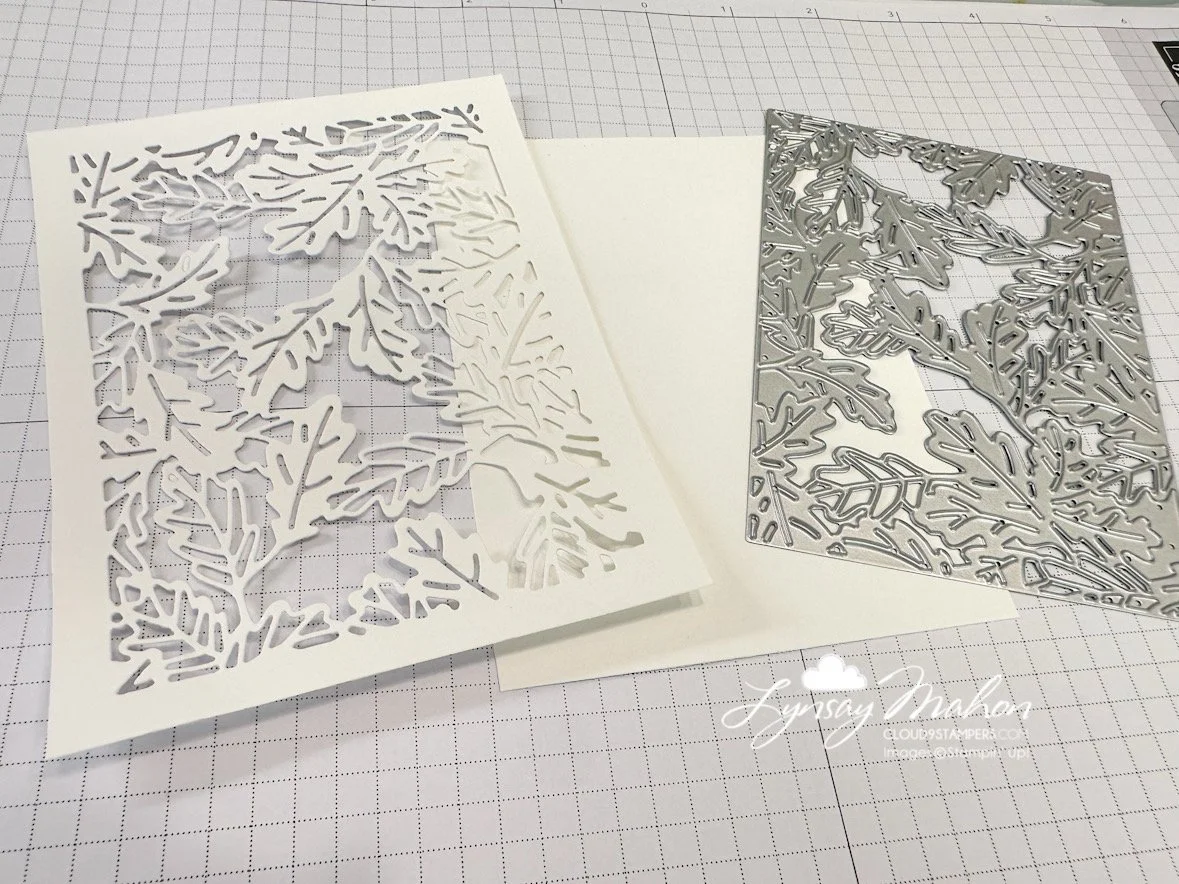
Cut your chosen die shape into a 4-1/4" x 5-1/2" piece of white cardstock, die-cut the leaf background die positioning it right in the center. This becomes your custom stencil template.
Step 2: Mix Your Color Magic
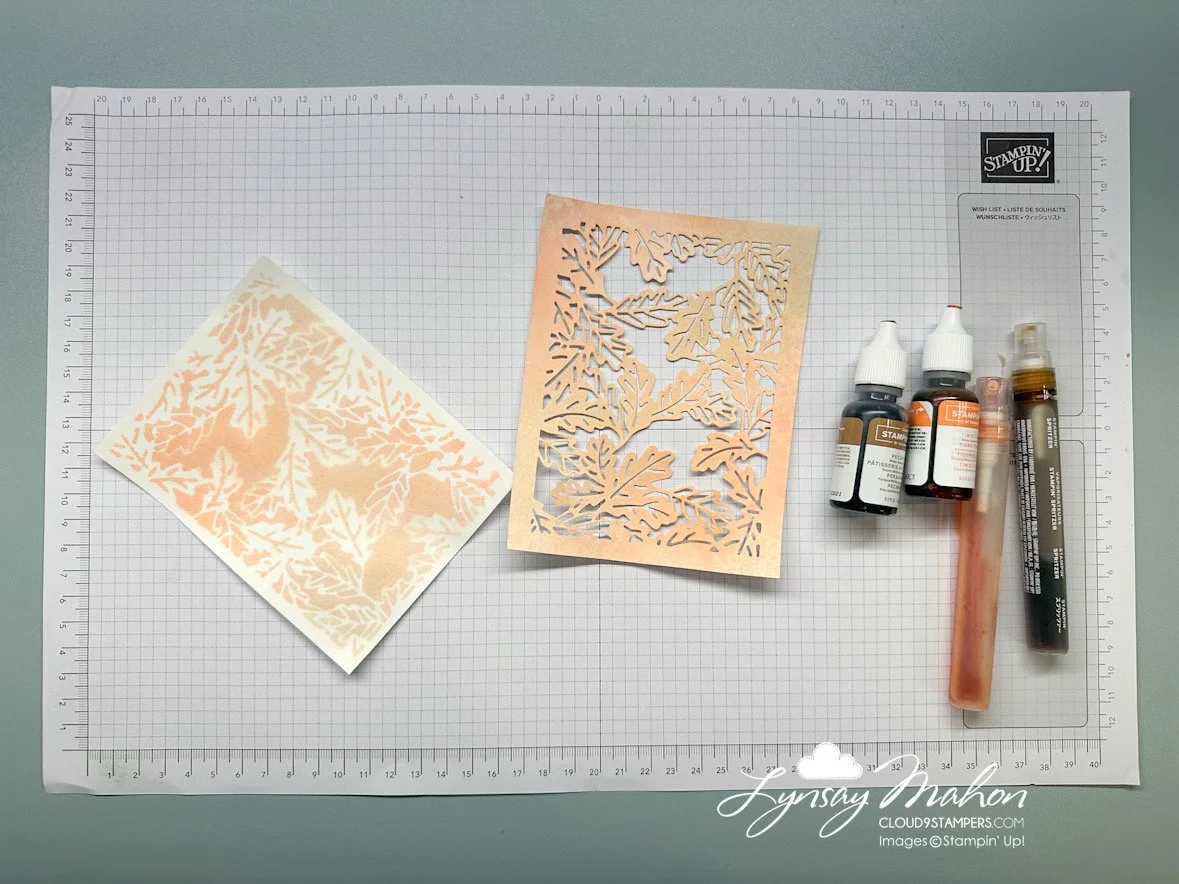
Fill your first spray bottle with water and add 10 drops of Timid Tiger Ink Refill. In the second bottle, combine water with 10 drops of Pecan Pie Ink Refill. Give both a good shake – you're creating custom ink sprays!
Step 3: The Attachment Trick
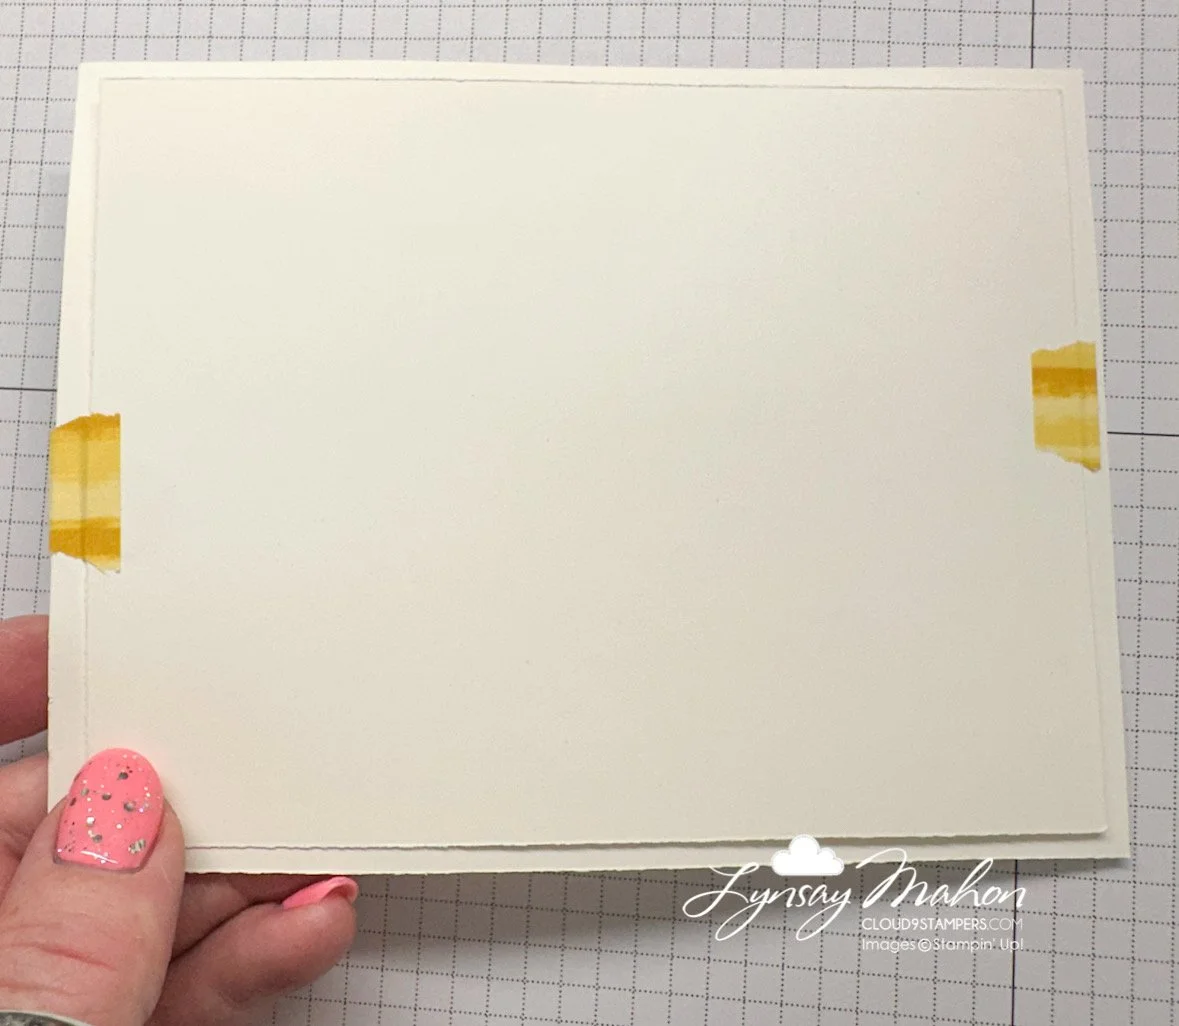
Here's where the magic happens: tape a fresh 4" x 5-1/4" piece of cardstock to the back of your die-cut stencil using washi tape. This creates the perfect spraying surface.
Step 4: Spray Away!
Flip your setup stencil-side up and start spritzing. Watch as gorgeous, custom patterns emerge! The beauty is in the control – light misting for subtle effects, or go bold with heavier coverage. Remove the stencil.
Step 5: The Big Reveal
Carefully remove your DIY stencil and let your masterpiece dry (or speed things up with a heat tool if you're impatient like me!).
Step 6: Decorate The Card Front!
Use washi tape to hold the page in place behind the stencil
Use Stampin’ Spritzers mixed with ink refill to create the desired colour.
Pro Tips That Make All the Difference
Mix and Match Like a Boss: This custom stencil technique works with any die shape – flowers, geometric patterns, even alphabet dies. Each one becomes a unique design tool in your arsenal.
Layer for Depth: Create multiple custom stencils and layer them for complex, professional-looking backgrounds that would cost a fortune to buy.
Experiment with Mediums: Don't stop at ink sprays! Try this technique with embossing paste or even glitter sprays for different effects.
Be sure to hop along with the rest of the Totally Techniques Blog Hop team and see what the crew designed!
Have you tried making DIY stencils before? Drop a comment below and share your favorite custom stencil technique discoveries! I love seeing how creative minds take these ideas and run with them.
And if you're new to paper crafting techniques, don't worry – this is the perfect place to start. Simple, affordable, and absolutely addictive in the best way possible.
Warmly,
Lynsay


![Stampin' Cut & Emboss Machine [ 149653 ] Stampin' Cut & Emboss Machine [ 149653 ]](https://assets1.tamsnetwork.com/images/EC042017NF/149653s.jpg)
![Stylish Shapes Dies [ 159183 ] Stylish Shapes Dies [ 159183 ]](https://assets1.tamsnetwork.com/images/EC042017NF/159183s.jpg)
![Stampin' Spritzer [ 126185 ] Stampin' Spritzer [ 126185 ]](https://assets1.tamsnetwork.com/images/EC042017NF/126185s.jpg)
![Timid Tiger Classic Stampin' Ink Refill [ 165283 ] Timid Tiger Classic Stampin' Ink Refill [ 165283 ]](https://assets1.tamsnetwork.com/images/EC042017NF/165283s.jpg)
![Timid Tiger 8 1/2" X 11" Cardstock [ 165626 ] Timid Tiger 8 1/2" X 11" Cardstock [ 165626 ]](https://assets1.tamsnetwork.com/images/EC042017NF/165626s.jpg)
![Pecan Pie Classic Stampin' Ink Refill [ 161669 ] Pecan Pie Classic Stampin' Ink Refill [ 161669 ]](https://assets1.tamsnetwork.com/images/EC042017NF/161669s.jpg)
![Pecan Pie 8 1/2" X 11" Cardstock [ 161717 ] Pecan Pie 8 1/2" X 11" Cardstock [ 161717 ]](https://assets1.tamsnetwork.com/images/EC042017NF/161717s.jpg)
![Early Espresso Classic Stampin' Pad [ 147114 ] Early Espresso Classic Stampin' Pad [ 147114 ]](https://assets1.tamsnetwork.com/images/EC042017NF/147114s.jpg)
![Basic White 8 1/2" X 11" Cardstock [ 166780 ] Basic White 8 1/2" X 11" Cardstock [ 166780 ]](https://assets1.tamsnetwork.com/images/EC042017NF/166780s.jpg)
